


At Audio Animals, we're always looking for ways to push boundaries, improve our workflow and explore new ideas within professional audio. This time, that ambition has taken us beyond using high-end equipment and into helping create it.
The opportunity came through a collaboration with Hendy Amps, turning an idea we had for a completely different approach to analogue saturation into a real piece of hardware.
It began after numerous conversations with Jason at SX Pro about wanting to see something genuinely new. Not another EQ, another compressor or another colour box, but a piece of equipment that solved a problem we regularly encountered in mastering.
Jason eventually suggested the obvious question: why not build exactly what we wanted?
We knew what we wanted the unit to achieve. What we didn't know was how to build it. That's where Chris at Hendy Amps entered the story.
The Michelangelo XL:
From an Idea to Real Hardware
After that conversation with Jason, we were introduced to Chris at Hendy Amps and began explaining the concept. Almost immediately, it was obvious that Chris was as excited about the idea as we were.
What started as a custom unit designed around our own mastering workflow eventually developed into a new interpretation of Hendy Amps' highly regarded Michelangelo.
The concept centred around one particular problem we repeatedly encountered when using saturation during mastering.
We wanted to be able to push saturation much harder without simply making the target frequency louder.
The Idea Behind the Michelangelo XL
One of the challenges with saturation is that pushing a circuit harder often increases the apparent level of the frequency range you're trying to enhance. Eventually you reach the point where the additional level becomes too much, forcing you to back the saturation off even though you may prefer the tone created by the more aggressive setting.
Our idea for the Michelangelo XL was to separate those two things.
The MOSFET section can be pushed to create the desired amount of saturation while the corresponding Tube section can be reduced to compensate for the change in level.
Instead of the target frequency simply becoming louder, it can remain at a similar perceived level while gaining additional harmonic density, weight and character.
It's much easier to understand when you can hear the unit and see what is happening to the frequency curve, which is why the video below is worth watching.
Watch the Michelangelo XL in Action
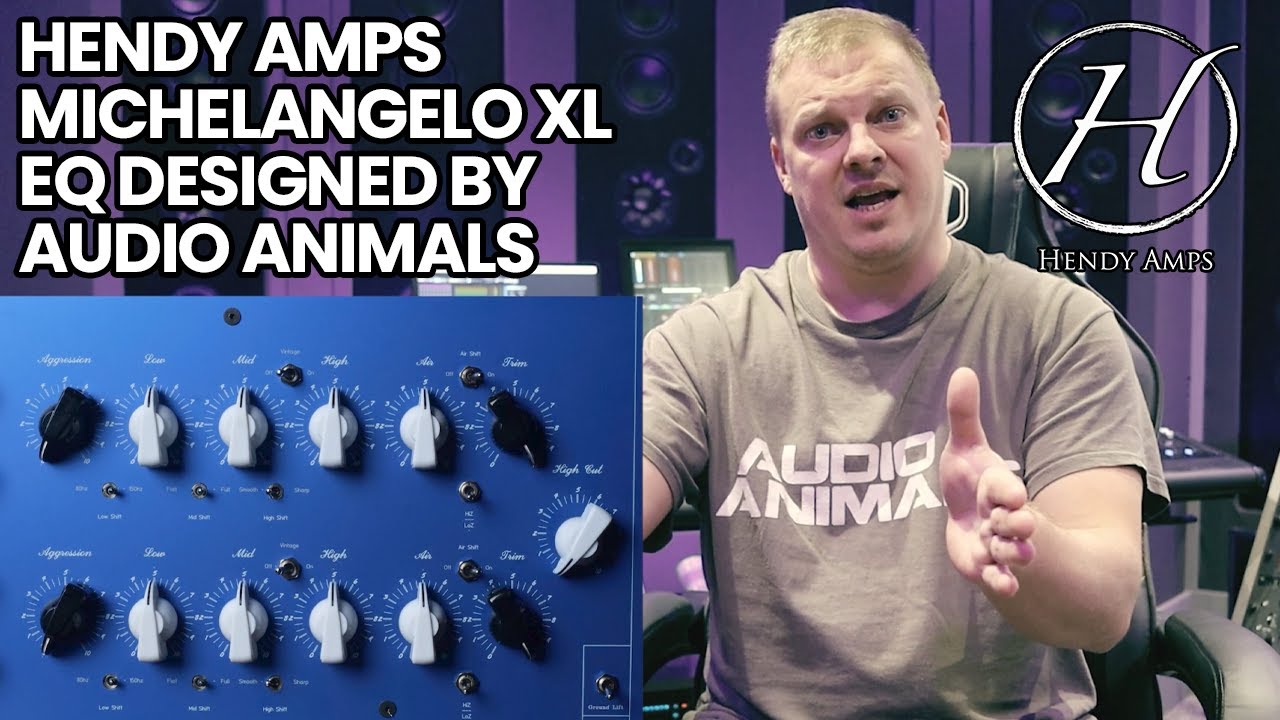
Hendy Amps Michelangelo XL
The Michelangelo XL takes the character and musicality of the original Michelangelo and expands the concept with additional control designed for detailed mixing and mastering applications.
Why We Wanted More Control
For saturation in my mastering chain, I already use the Black Box Analog Design HG-2 and I love what it does. The limitation for my particular workflow is the amount of frequency-specific control available when deciding exactly where I want the saturation to work.
With the Michelangelo XL, saturation can be applied independently across the lows, mids, highs and air region. That gives me considerably more control over which part of the spectrum receives additional harmonic character.
The low end was particularly important. There are times when I want saturation to affect the weight and sub information without significantly changing the upper portion of the kick drum.
The Michelangelo XL provides selectable 80 Hz and 150 Hz low-frequency options, allowing the processing to be focused differently depending on the material.
Hearing It for the First Time
When we finally heard the unit for the first time, the big question was whether the concept would actually deliver what we had imagined.
We already knew how good the original Michelangelo sounded, but this was something different: another processing path working alongside it, using MOSFETs rather than tubes.
The result was better than we expected. Chris demonstrated the unit across some drums he had recorded, and the amount of weight he could introduce into the kick while keeping it controlled was exactly what we had been looking for.
Hearing an idea that had existed largely in our heads finally working as a finished analogue circuit was a very special moment.

Michelangelo XL Controls
Aggression
Alters the drive within the circuit, allowing the tubes or MOSFET section to be pushed harder for additional saturation and harmonic character.
Low
Controls the low-frequency band while introducing increasing dynamic and harmonic character as the control is pushed.
Mid
Controls an extremely broad midrange area and can be used to shape a significant portion of the tonal balance.
High
Shapes the high-frequency band while adding the harmonic behaviour that makes the Michelangelo different from a conventional EQ.
Air
Boosts the uppermost frequencies to introduce additional openness, brightness and air.
High Cut
Exclusive to the XL version, the High Cut provides a musical way to roll off the upper air region when required.
Low Shift
Changes the response of the Low control, allowing it to target frequencies below either 150 Hz or 80 Hz.
Mid Shift
Alters the relationship between the Low and Mid controls, effectively determining which section handles the low-mid region.
High Shift
Changes the High control so that it targets frequencies above either 1 kHz or 2 kHz.
Vintage
Switches between a cleaner, more modern presentation and a darker, more vintage-style character.
LoZ / HiZ
Changes the output impedance. HiZ introduces greater interaction with equipment later in the chain, while LoZ provides a cleaner output behaviour.

Paul's Michelangelo XL
I went with the standard black version for my Michelangelo XL, using red Aggression and Trim controls with white knobs for the remaining controls.
My unit is the prototype and will always have a special place in the studio. This isn't a piece of equipment you'll ever see me putting on Reverb or eBay.
Functionally, I didn't want to change the production design because by that point the unit already did exactly what I wanted. The only personal addition was having my name added to the front panel.

Nick's Michelangelo XL
Nick Burchall's Michelangelo XL also carries his name, reflecting the fact that the concept was something we brainstormed and developed together.
Nick chose the blue version so the two Audio Animals units would have their own identity. His version uses black Aggression and Trim controls with white knobs across the remaining controls.

Turning the Idea Into Reality
Most importantly, huge credit has to go to Chris at Hendy Amps. We came to him with an idea for what we wanted the unit to achieve, but turning that concept into a working piece of analogue hardware required a completely different level of expertise.
At the beginning, none of us knew with certainty whether the concept would work exactly as imagined. Chris was willing to experiment with it, understand what we were trying to achieve and work out how it could actually be implemented.
It's easy for us as engineers to describe what we'd like a piece of equipment to do. It's another thing entirely to understand the electronics well enough to determine what is possible and then design a circuit that actually delivers it.
Chris managed to take what started as a fairly ambitious idea and turn it into a finished piece of equipment that exceeded our expectations.

From Studio Problem to the Michelangelo XL
The Michelangelo XL started with a simple question: could we create a piece of analogue hardware that allowed us to push saturation harder while retaining greater control over level and frequency?
Working with Chris at Hendy Amps allowed that idea to move from a conversation into a real piece of equipment.
For us, that's one of the most exciting parts of audio engineering. Sometimes progressing your workflow isn't about finding another existing piece of equipment. It's about identifying a problem, questioning why it exists and seeing whether something better can be built.